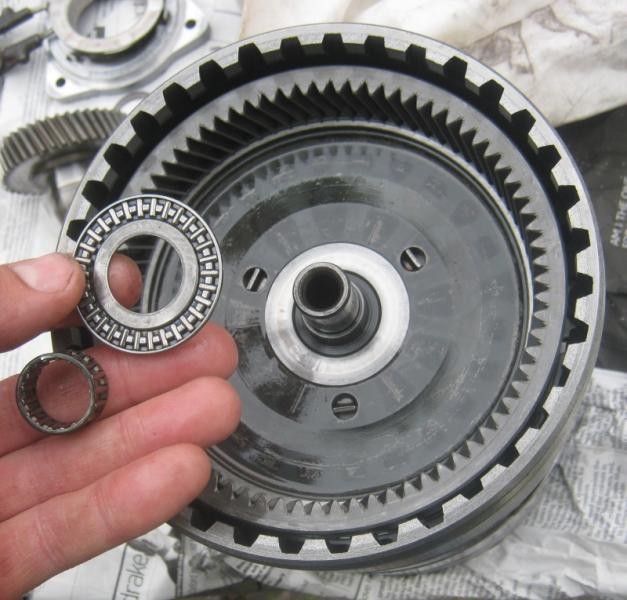
Continuing our detailed guide on rebuilding your Mercedes A-Class automatic transmission, this section focuses on the removal of the secondary pump and tail cone. This step is crucial for accessing further internal components and requires careful handling, especially with delicate parts involved.
Before proceeding, it’s essential to note a warning about delicate bearing races located at the rear end of the gear set on the intermediate shaft. These components are easily visible once you’ve reached this stage of disassembly.
Ensure these bearing races are removed carefully and stored safely to prevent any damage during the ongoing rebuild process of your Mercedes automatic transmission.
Removing the Secondary Pump Cap
While the original disassembly order might differ, removing the secondary pump cap at this stage is advisable for ease of access. The pump cap, part of the pump casting, is secured with a unique dzus head fastener, which can sometimes be challenging to remove due to corrosion or wear.
For stubborn caps, carefully cleaning away any corrosion around the fastener can improve tool engagement. A rounded-off bar or a specialized tool designed for the 722.1 secondary pump can be helpful in loosening and removing the cap without damaging it.
Once the cap is off, you’ll gain partial access to the secondary pump mechanism within your Mercedes A Automatic transmission.
It’s important to note that at this juncture, only the cap section and the return pressure spring of the secondary pump can be removed. The main body of the secondary pump remains attached, secured by a locating bolt accessible from inside the tail cone section, which we will address next.
Tail Cone Section Removal
With the secondary pump partially addressed, the next step is to remove the tail cone section. This involves detaching the bolts holding it to the center casing.
While the ATSG manual suggests using a specialized puller tool for removing the tail cone, this tool is designed for use when the gear set and front bell housing are still in place, leveraging the output shaft for pulling force. Without these components, using the puller at this stage might push the output shaft further into the main casing, which is not desired.
In practice, gentle and careful tapping with a rubber mallet around the tail cone section’s joint with the center casing often suffices to loosen and remove it effectively.
Once the tail cone section is removed, internal components like the governor and speedometer drive become visible.
Alongside the governor, you’ll also find the cam follower for the secondary pump and the mechanical speedometer drive, a standard feature in most 722.118 Mercedes transmissions.
This step completes the removal of the tail cone and partial secondary pump disassembly, preparing your Mercedes A automatic transmission for the next stages of the rebuild process. Remember to keep all removed parts organized and clean for reassembly.
