Maintaining your vehicle’s engine oil is crucial for its longevity and performance. Many drivers, whether new car owners or seasoned motorists, sometimes feel uncertain about performing basic checks like monitoring their engine oil level. Understanding How To Check Oil Level In Car is a fundamental skill that empowers you to proactively care for your vehicle and prevent potential engine issues.
While modern vehicles often come equipped with digital dashboard monitors that provide oil level updates, knowing how to manually check your oil with the dipstick remains a valuable skill. This guide provides you with a straightforward, step-by-step process to confidently check your car’s oil level at home. Remember, for the most accurate instructions tailored to your specific vehicle, always refer to your owner’s manual.
Step-by-Step Guide: How to Manually Check Your Car’s Oil Level
Checking your car’s oil level manually is a simple task that requires no special tools and only a few minutes of your time. Follow these steps to ensure your engine has the right amount of oil:
-
Gather Your Supplies: Before you begin, make sure you have a rag or paper towels readily available. Checking your oil can sometimes get a little messy, and having these on hand will help keep things clean.
-
Park on Level Ground: Ensure your car is parked on a flat, level surface. This is important because an uneven surface can lead to an inaccurate oil level reading.
-
Engine Condition: Cool or Warm? The engine should ideally be turned off before you check the oil level. For safety, it’s best to check when the engine is cold to avoid burns from hot engine components. However, some car manufacturers recommend checking the oil when the engine is warm. Always consult your vehicle’s owner’s manual for the manufacturer’s specific recommendation for your car model.
-
Locate the Oil Dipstick: Open your car’s hood and prop it open safely. Now, look for the oil dipstick. It’s typically easy to identify by its brightly colored handle, often orange or yellow, and is usually located near the engine block.
-
Initial Dipstick Removal and Wipe: Pull the dipstick out completely. You’ll likely see oil on the end of it. Use your rag or paper towel to thoroughly wipe all the oil off the dipstick. This initial wipe is important for getting an accurate reading.
-
Re-insert and Remove Again: Push the dipstick all the way back into its tube until it’s fully seated. Then, pull it out again for the second time. This second removal is what you will use to read the current oil level.
-
Read the Oil Level: Carefully examine the end of the dipstick. It will have markings to indicate the correct oil level range. These markings can vary but commonly include:
- Two Pinholes: The oil level should be between these two pinholes.
- “L” and “H” Markings: These stand for “Low” and “High.” The oil level should be somewhere between these letters.
- “MIN” and “MAX” Markings: Similar to “L” and “H,” these indicate the minimum and maximum acceptable oil levels.
- Crosshatched Area: A simple shaded or crosshatched area indicates the safe operating range. As long as the oil “streak” on the dipstick is within this area, your oil level is generally good.
If the oil level is below the “Low” or “MIN” mark, or below the lower pinhole or crosshatch boundary, it means your car needs more oil.
 Checking engine oil level using dipstick in a car for routine vehicle maintenance.
What to Do If Your Car is Low on Oil
Discovering a low oil level, whether through a digital dashboard warning or a dipstick check, signals that you need to add motor oil. It’s vital to use the correct type of oil recommended by your car’s manufacturer. This information is usually found in your owner’s manual and often indicated by grades like 0W-20 or 5W-30.
If you’re unsure about the correct oil grade for your vehicle or can’t locate your owner’s manual, it’s always best to consult a professional technician. They can quickly access the necessary information and advise you on the right oil for your car.
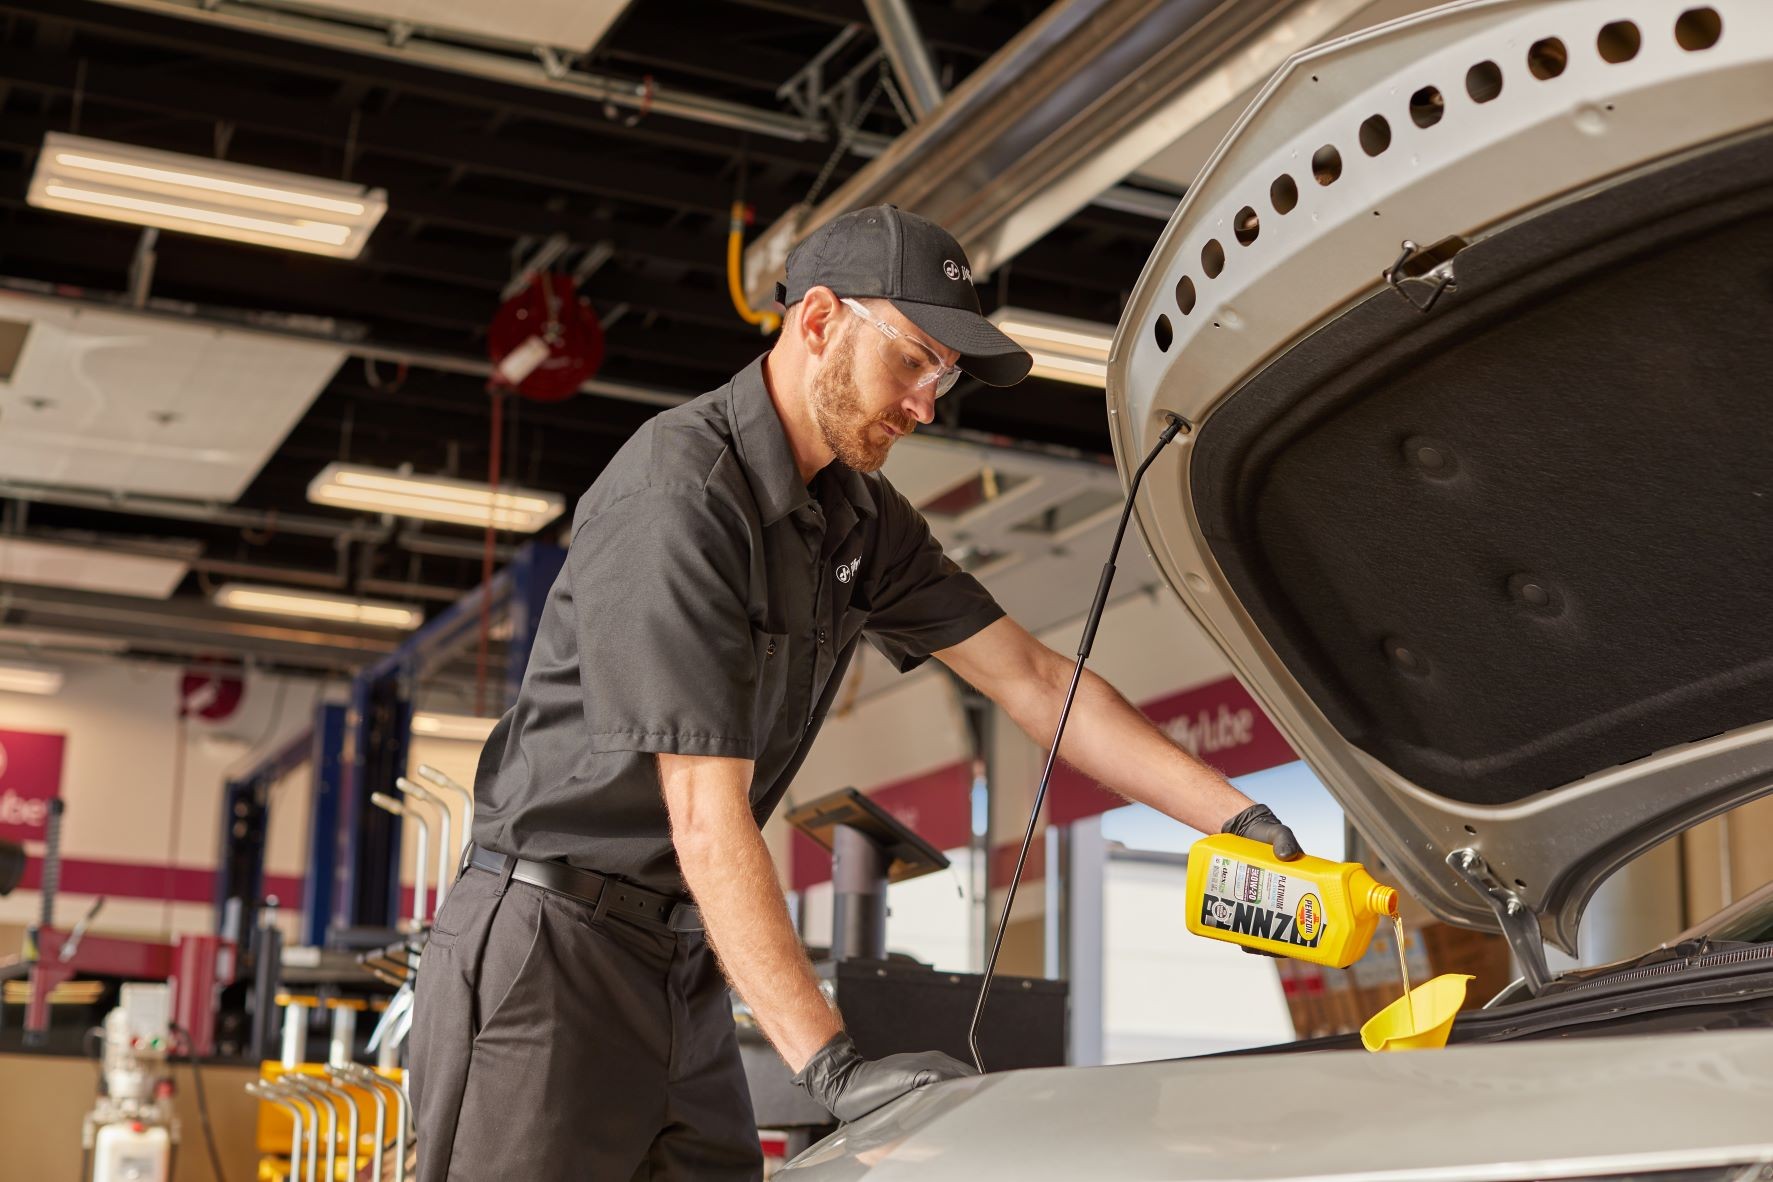
How to Safely Add Oil to Your Car
If you need to add oil, follow these steps carefully to avoid spills and ensure you don’t overfill:
-
Prepare for Adding Oil: Have a funnel ready to prevent spills. Locate your engine oil filler cap. It’s usually on top of the engine and clearly marked with an oil can symbol or words like “Oil” or “Engine Oil.”
-
Remove the Oil Filler Cap: Unscrew and remove the oil filler cap. Place it aside in a clean spot.
-
Add Oil Gradually: Pour the recommended grade of oil into the filler opening using your funnel. Add oil a little at a time. Overfilling can be as damaging to your engine as underfilling, so it’s crucial to add oil incrementally.
-
Start with a Partial Quart: Begin by adding about half a quart (approximately 16 ounces) of oil.
-
Wait and Re-Check: Give the oil a minute or two to settle and drain down into the oil pan. Then, re-check the oil level using the dipstick, following steps 5-7 again.
-
Add More if Needed: If the oil level is still below or near the minimum mark after adding half a quart, add the remaining half of the quart. Re-check the dipstick again after each addition until the level is within the acceptable range on the dipstick.
-
Replace the Filler Cap: Once the oil level is correct, securely screw the oil filler cap back into place.
How Often Should You Check Your Oil Level?
Regularly checking your engine oil level is a cornerstone of good car maintenance. It’s a good practice to make oil checks part of your routine vehicle care. A helpful reminder is to check your oil level at least once a month or before any long road trips. Some experts even recommend checking it every time you refuel your car.
By making it a habit to periodically check your oil, you can catch potential leaks or excessive oil consumption early, preventing costly engine damage and ensuring your vehicle runs smoothly for years to come.
Checking your car’s oil level is a simple yet vital maintenance task that every car owner can and should learn. By following these easy steps, you can stay informed about your engine’s health and contribute to the longevity of your vehicle.