Removing the shell from your Genesis Truck model for maintenance or repair can seem daunting, but with a careful approach, it’s a straightforward process. This guide will walk you through the steps, ensuring you can access the internal components without damaging the delicate exterior or intricate mechanisms. Whether you’re performing routine maintenance, upgrading parts, or diagnosing an issue, understanding how to safely remove and reinstall the shell is essential for any automotive enthusiast or model repair technician.
Accessing the Genesis Truck Chassis: A Step-by-Step Approach
The first step in any repair or maintenance task is gaining access to the area you need to work on. In the case of a Genesis truck model, this often means carefully removing the outer shell to expose the chassis and internal components. Like many detailed models, the Genesis truck shell is designed to be removed, allowing for intricate work on the mechanisms within.
To begin, locate the points where the shell is secured to the chassis. Manufacturers often use clips or pressure fittings to hold the shell in place, avoiding the need for screws which can detract from the model’s realism. In many models, including Genesis trucks, these clips are often located near the base of the body, close to the chassis frame.
This image is for illustrative purposes only and may not directly represent a Genesis truck model. It is intended to show typical clip locations on a model chassis.
A common technique for releasing these clips involves applying gentle pressure at specific points. Often, these points are near prominent features of the model, such as cooling fans on the hood or around the wheel wells. The key is to apply even, gentle pressure rather than forcing any single point, which could lead to damage.
Identifying and Releasing Shell Clips
To effectively remove the shell, you’ll need to identify the exact location and type of clips securing it. A bright flashlight is an invaluable tool for this step. By shining the light along the seam where the shell meets the chassis, you can often see the clips peeking through small gaps. This visual inspection will give you a clearer idea of where to apply pressure to release them.
This image is for illustrative purposes only and may not directly represent a Genesis truck model. It is intended to demonstrate the technique of using a flashlight for inspection.
Once you’ve located the clips, you’ll need a tool to gently release them. A small, flat-head screwdriver, almost needle-fine, is ideal for this task. The goal is not to pry the shell off, but to gently depress the clips, allowing the shell to separate from the chassis. Work methodically, releasing clips on one side of the truck first, and then moving to the other side.
Caution: Be particularly careful around delicate details such as grab irons, railings, and light fittings. These components are often attached to both the shell and the chassis and can be easily damaged if the shell is removed forcefully. If these parts are not glued, they should detach with gentle manipulation. If they seem stuck, inspect closely to ensure they are not still fastened before proceeding with shell removal.
Addressing Potential Issues: Stuck Components and Wiring
During shell removal, you might encounter a few common issues. One is components that seem to be stuck or not releasing cleanly. This is often due to wires connecting lights or other features mounted on the shell to the chassis.
This image is for illustrative purposes only and may not directly represent a Genesis truck model. It is intended to show a general wiring layout in a model.
Before completely separating the shell, check for any wiring connections. Gently lift the shell just enough to see if wires are present. In many models, you’ll find wires for headlights, taillights, or ditch lights. These wires are usually connected with small plugs that can be carefully disconnected. Make sure to note the orientation of any plugs before disconnecting them to ensure correct reassembly.
Wire Management: Observe how the wires are routed and secured. Many manufacturers provide channels or grooves to keep wires out of the way of moving parts and to prevent pinching. Pay attention to these details during disassembly so you can correctly route the wires during reassembly.
Troubleshooting Chassis and Drivetrain
Once the shell is removed, you have full access to the chassis and drivetrain of your Genesis truck model. This is the ideal time to perform maintenance, upgrades, or diagnose any operational issues. Common problems in models can include derailment issues or noises from the drivetrain.
Derailment Issues: If your Genesis truck model is experiencing derailments, especially on turnouts or switches, inspect the wheels and track for any irregularities. Sometimes, the points of turnouts may be slightly lower than the stock rail, causing the wheels to ride up and derail. Testing the model chassis without the shell can help isolate whether the issue is with the chassis or the shell itself.
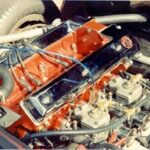
Drivetrain Noises: Clicking or grinding noises from the drivetrain often indicate a problem within the gears or motor. To investigate, you may need to disassemble the trucks (wheel and gear assemblies). Carefully examine the gears for burrs or debris. A small burr on a worm gear, for example, can cause significant noise and friction. Gentle filing to remove burrs and proper lubrication with grease (instead of thin oil, which can dissipate quickly) can significantly improve performance and reduce noise.
This image is for illustrative purposes only and may not directly represent a Genesis truck model truck assembly. It is intended to show the general components of a model truck assembly.
Lubrication: Proper lubrication is crucial for smooth and quiet operation. Use a high-quality grease specifically designed for model gears. Apply it sparingly to gear teeth and bearing surfaces. Avoid over-lubrication, as excess grease can attract dust and debris.
Reassembling Your Genesis Truck Model
After completing your maintenance or repairs, reassembling your Genesis truck model is the final step. Carefully reconnect any wires, ensuring they are routed correctly and plugs are fully seated. Gently place the shell back onto the chassis, aligning the clips with their corresponding points. Apply even pressure to snap the shell back into place.
Double-check that all components are correctly positioned and that the shell is securely fastened. Test the model’s operation to ensure everything is working as expected.
By following these steps, you can confidently remove and reinstall the shell of your Genesis truck model, enabling you to perform necessary maintenance and repairs to keep your model running smoothly and looking its best.